

|
|
|
|
|
|
|
|
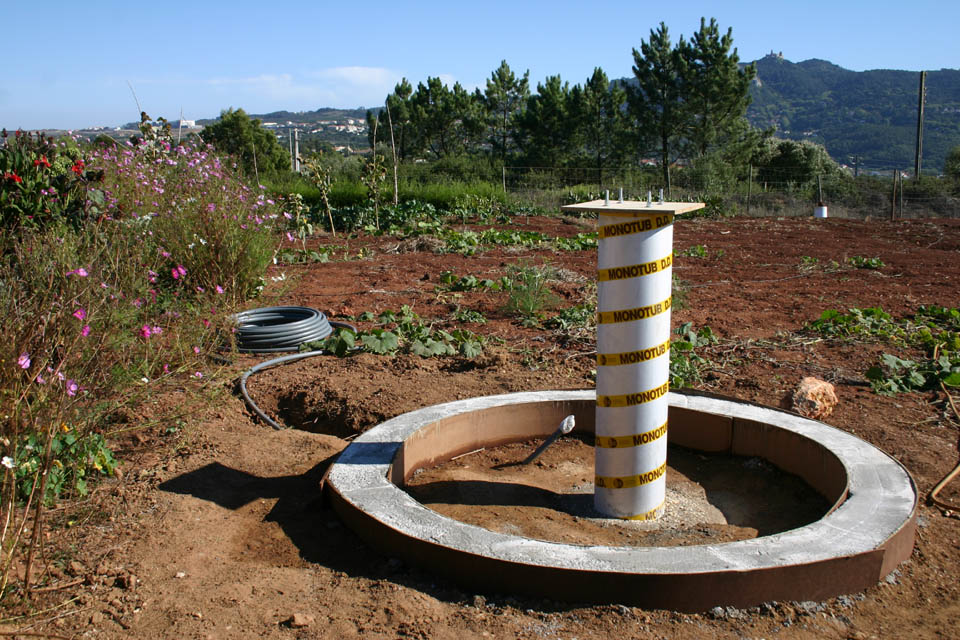
Pier Inside a 700 x 700 x 500 mm excavated pit I created a rebar framework wired together. After the framework was complete a 1700 mm section of "Sonotube" was dropped over the pier rebar framework and set below the concrete line. Based on my telescope dimensions, I located the pier centerline 160 mm offset southwards to the observatory centerline. For the base ring, I excavated a 200 mm deep circular trench and utilized 400 mm width masonite lengths as framework.
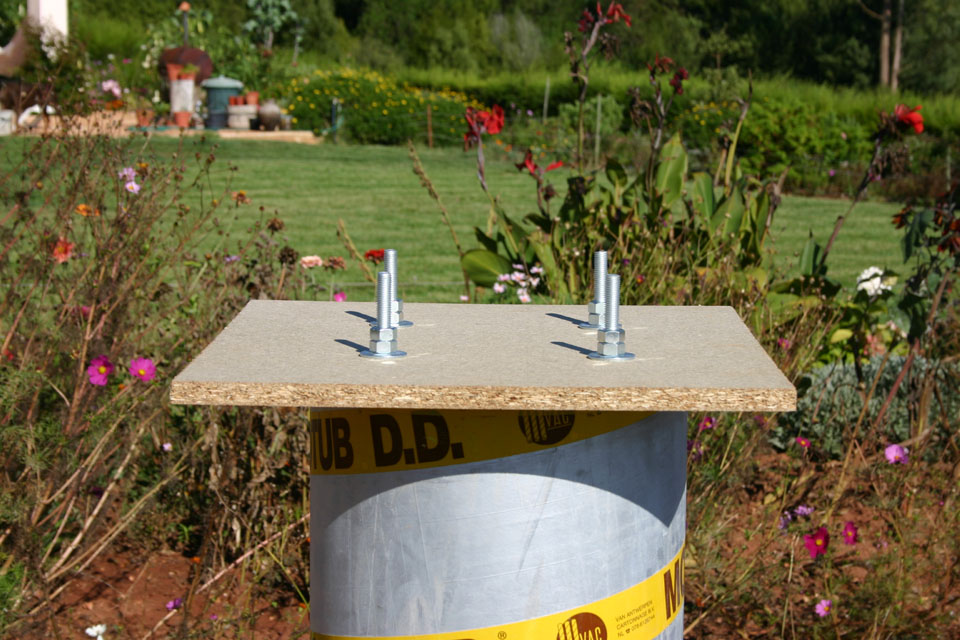
A cable duct run underneath the base ring to carry out the necessary electric power from the house main distribution board to the observatory. A 2.5 sq. mm power cable was later installed inside the duct. No provision for data cables was made because I wanted to operate wireless. Four 500 mm anchor bolts were hung into the we concrete at the top of the tube. I bolted them onto a wooden plate and placed the plate across the top of the tube with the base of the bolts dropping generously into the concrete to about 100 mm of the threads.
This was to make sure that I would have no problems with the placement of the final metal plates I intended to install on the pier top to fix the Meade superwedge.
After 7 days I removed the paper from the sonotube. It looked great. There were some small air pockets near the top where the screen had trapped some of the concrete, but not bad at all. The complete pier was then painted in black.
|
|
![]()
![]()
![]()
![]()
![]()
![]()
![]()
![]()
![]()
This site was last updated 2019-02-18 Site created and maintained by Jorge Lázaro